Creating a new page in WordPress is easy!
Lets start by looking at the Dashboard of WordPress and navigating from there.
First click the “Pages” button on the left-hand side.
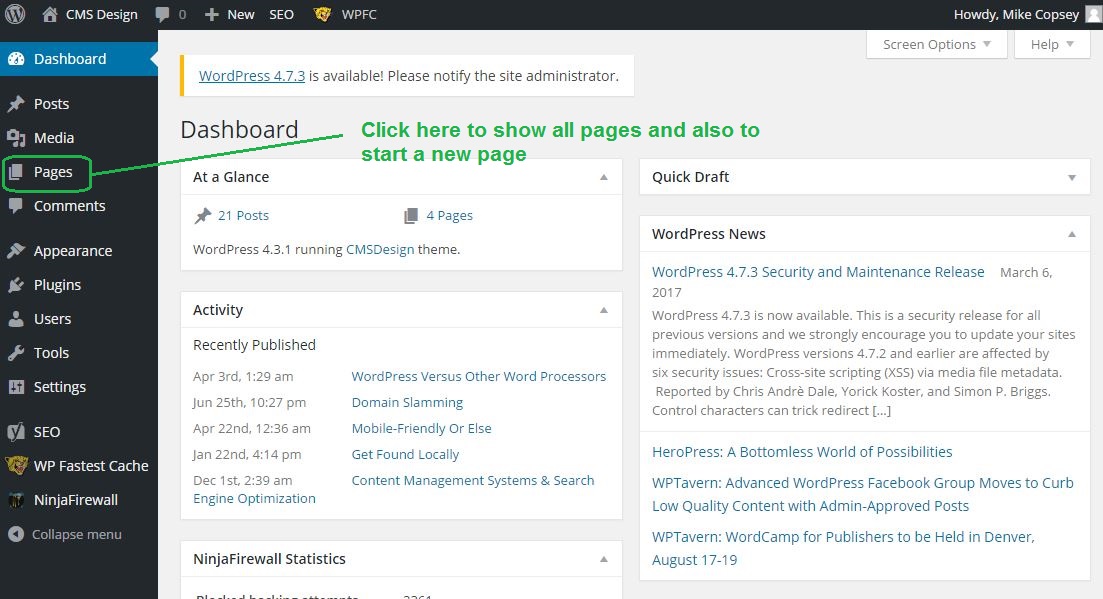
When the “Pages” page opens, you can either click the button at the top of the list of pages or the small link that opens in the left pane to start a new page.

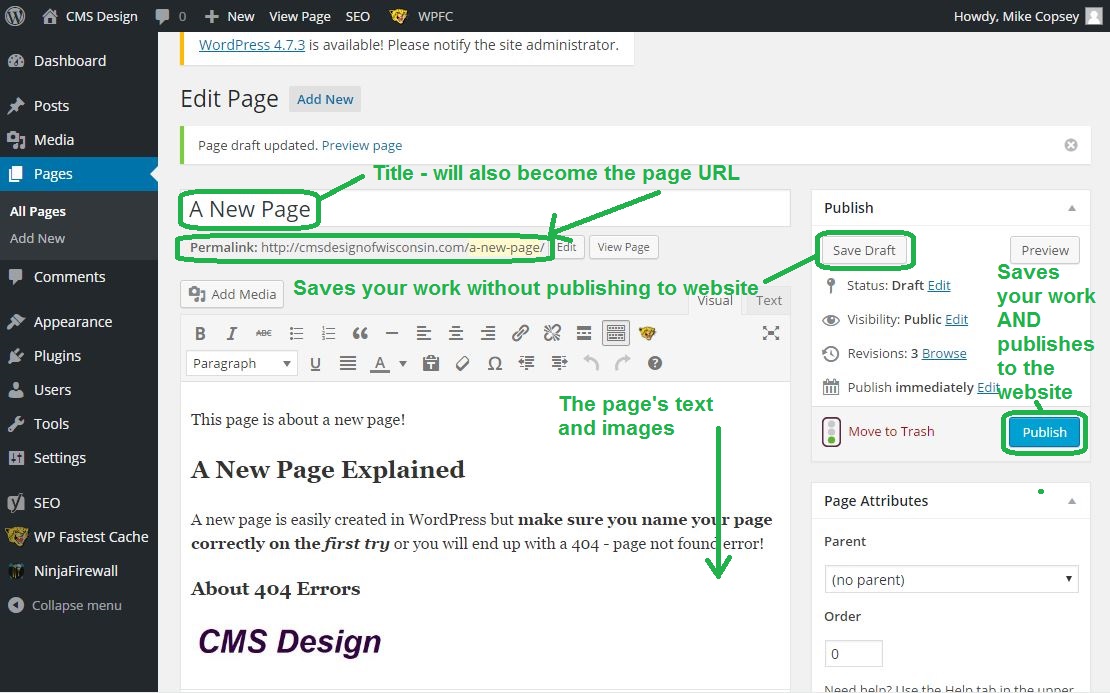
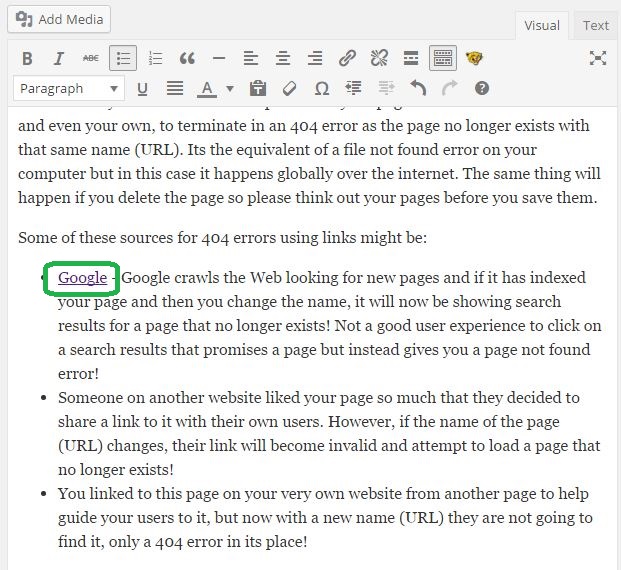
A new page with its editor should now be visible. I have added quite a bit to this page already to better explain it’s function. Let’s go over a few important points highlighted in green in the image below.
You can enter the title for the page in the title field. By doing only this and then saving the page, WordPress will automatically create the actual page URL (the address to the webpage on the website). WordPress will convert spaces to hyphens (to separate the words) because spaces cannot be part of a URL. This is also great for readability and SEO purposes as the words are cleanly separated. Think long and hard before you create that page or post name as once it is created, it can cause serious problems if you change or delete it in the future!
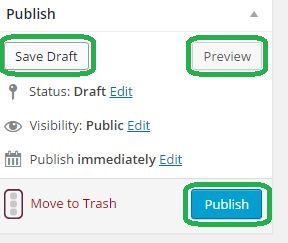
You can save you work on the server as a draft by clicking “Save Draft” so that you can continue to work on it another time OR you can save AND publish your work at the same time to also have it display the new page on the website by clicking the blue “Publish” button. There is also “move to trash” button in case you wish to delete the page entirely.
Editor Controls
This section will explain many of the text editor controls. Some versions of WordPress may be setup differently so not all controls may be visible or usable on your particular installation. Most all of these controls rely on you first highlighting the text or image with the mouse to designate what it is you want to change. A note about WordPress’s way of doing things: WordPress usually requires a carriage return at the end of these edits in order to understand how the edit is to take affect. In other words, if you are having trouble getting a You-Tube video or image to show up on the website after entering it in the editor, or if heading print continues where you don’t want it to be, go back and click the trailing edge of the item that is having problems and then hit the enter button. This often fixes an invisible or misbehaving item.
Heading Text Control
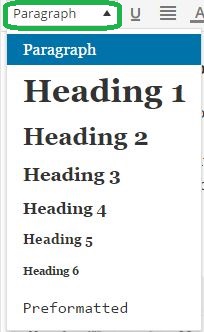
The heading / paragraph drop down control sets the text heading size or sets text as a paragraph. Typically every paragraph should be just that, a paragraph Heading one is resevered for the title of the page but headings 2 through 4 are used to sub divide sections of the page into smaller parts.
Adding Images & Other Media
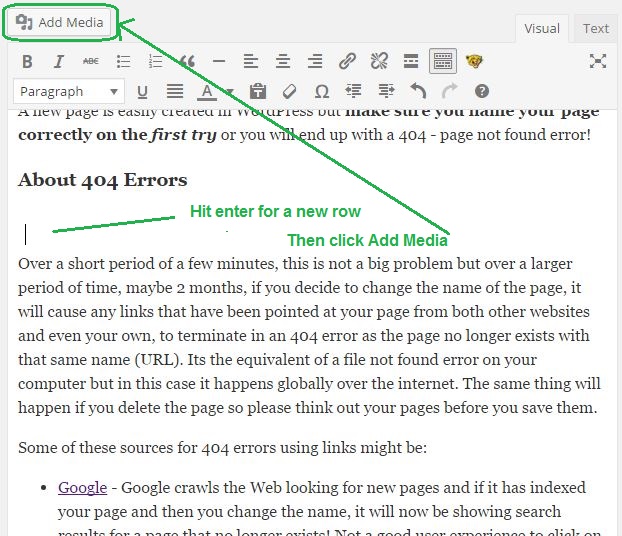
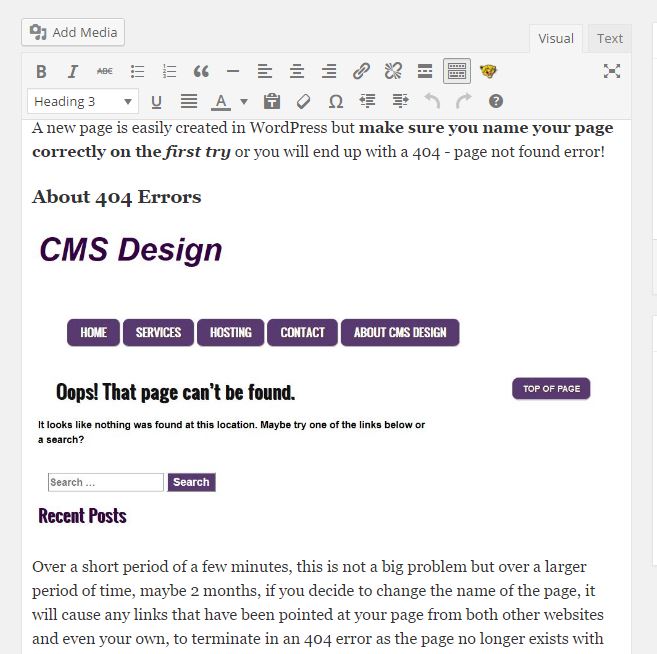
Adding Images and other forms of media like video and charts is all possible with WordPress however it is a two-step process: First you need to add the media to the media library, then add the media to your WordPress page from the media library. It all starts in the editor window. Here is the image we want to put on this page:
To do this, first find the spot where you wish to add the image or video then hit the enter button to position the cursor and then finally click the “Add Media” button.
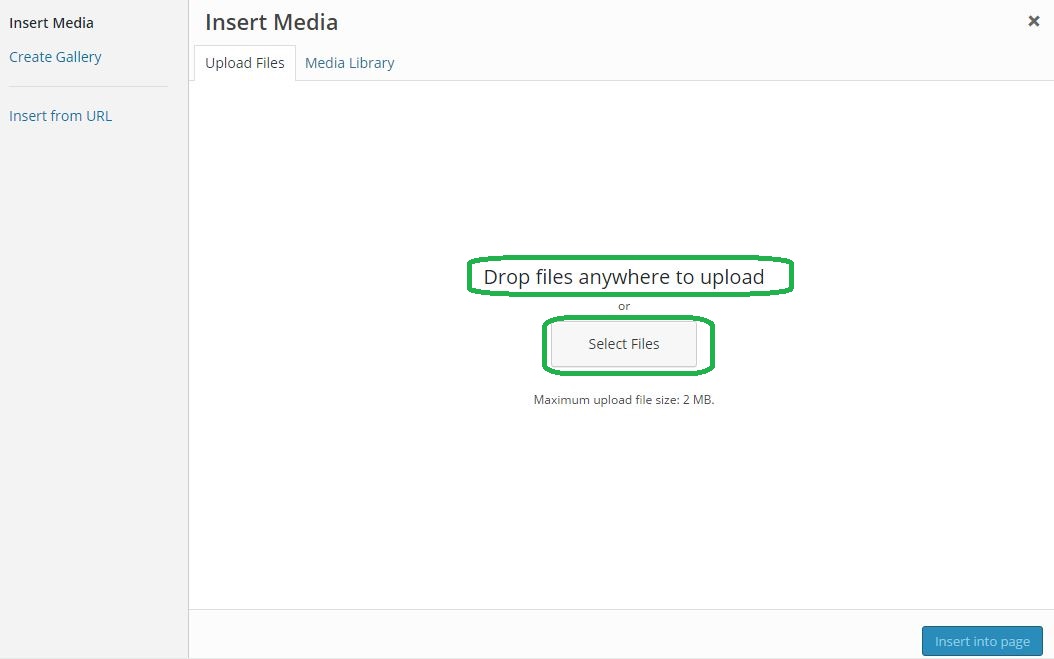
After clicking the “Add Media” button , you should get a screen somewhat like the one below. You have 2 choices:
1. Drag your image or video file right to the middle of this screen and let go of it there. This will start an upload to the media library.
2. Click the “Select Files” button to open a file dialog box (see images below this one)
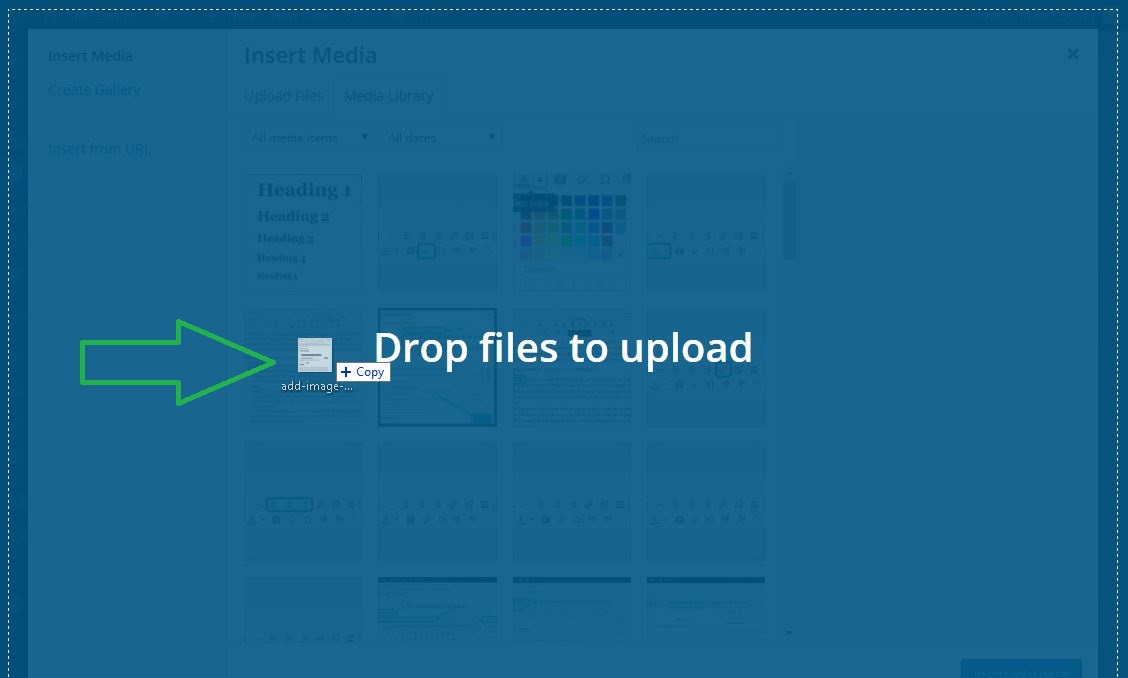
If you dragged the image, the screen will turn blue to show you are about to upload that image.
If you chose to open the file dialog box with a click, it should appear similar to below image.

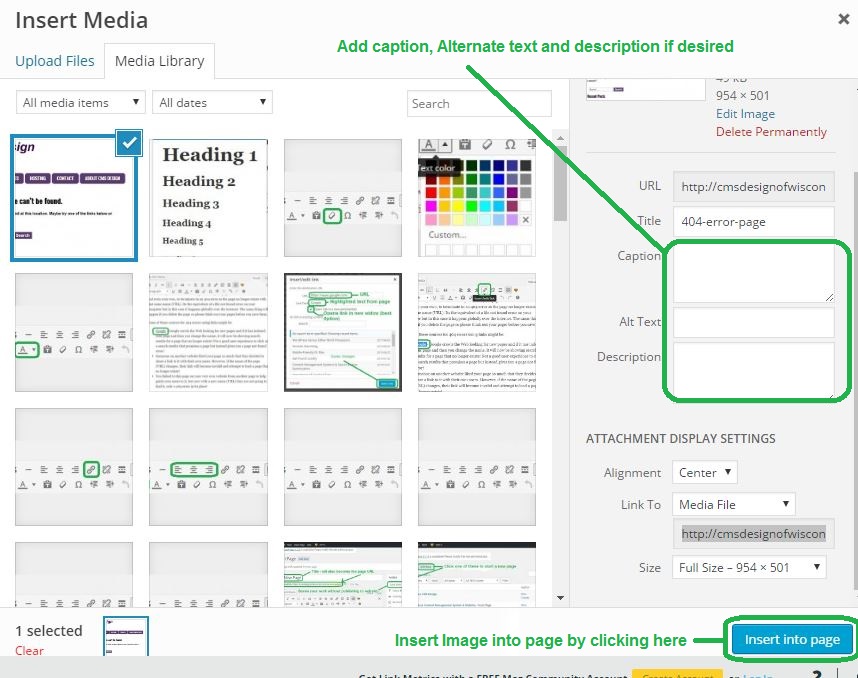
Once the image is uploaded into the library, locate it and click on it (see highlighted blue box below). It is recommended that you at least enter the “Alt” text (alternate text on right side) so that users with visual impairments can understand what the image is about. Also Search engines use this information to better understand how to return search results. Once done editing, click the “Insert Into Page” button at bottom of window to put the image in its place where the cursors was last left.
Now the image should appear in its place when you return to the page that you where editing.
Bold Text
Highlight the text you wish to be bold and then click the “B” bold button. Later on, if you wish to un-bold the text simply highlight it again and click the “B” bold button again.

Italic Text
Similar to bolding text, italicizing is accomplished in the same manner. Highligh text, then click the “I” italic button. To undo, highlight again and again click the “I” italic button.

Strike-Through & Underline
As with the above, creating strike-through text or underlined text works in the same manner; highlight and then click the appropriate button.

Bulleted or Numbered Lists
If you have a list of items, they can be easily turned into a list with “bullets” or numbers on the left side. There are 2 ways to do this:
- Highlight the entire set of paragraphs to be bulleted (if created first) and click the appropriate bullet button
- While typing in a list, click the bullet button first and then at the end of each list item hit the enter key to form the list item. Hit the enter key twice to get out of the list making mode.

Text Alignment & Justify
These buttons allow you to set left, center, right or justified text alignment. Remember that much of how this and some other settings work might rely on the actual design and layout of the website itself.

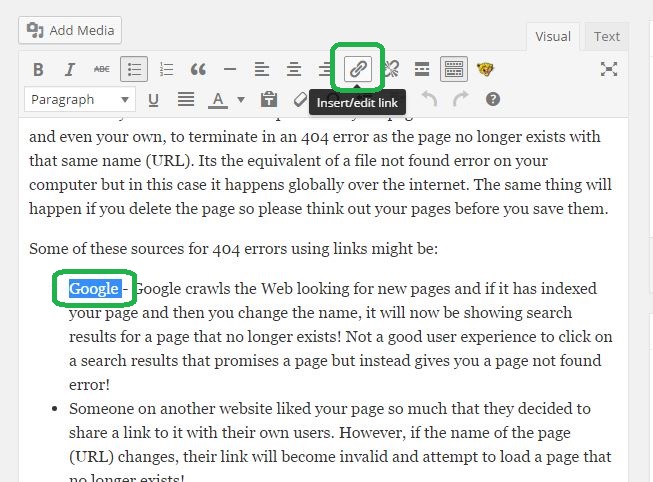
Insert or Edit a Link
To add a link to your text first highlight the text that you wish to turn into a link – this can also be changed once editing the link.

Once you have selected and then clicked the link button (above), the link editor window will open.
Link Editor
This is where you can edit an existing link or add in the the URL and even change the link text that was originally on the page (if you highlighted it first!)
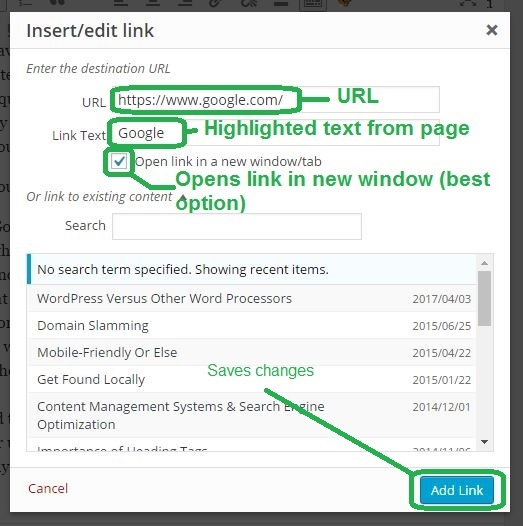
In most cases is is also preferable to select “Open link in new window” so that if the user closes the current window, they will still have your website in view. When finished editing, click the blue “Add Link” button at the bottom of the window. Now you have a new clickable link in your webpage!
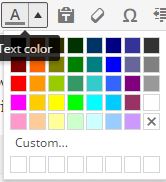
Text Color
With some themes, you will be able to change the text color. To do this simply select the text that you wish to change and then click the text color tool button.

After clicking the button you should get a small popup to select the color of choice.
Once you select a color, the text color tool will disappear and changes to the highlighted text will take place.
Clear Formatting Tool
Sometimes it is desirable to start with just text and no other formatting like bold etc.Also, you may be trying to paste text from another document that has extra formatting in it that may interfere with how the page lays out, colors, links etc. This may not be desirable and you can try to remove this extra formatting by using the clear formatting tool.

For more information about WordPress you can go to: https://codex.wordpress.org/New_To_WordPress_-_Where_to_Start